Vintage issues of magazines such as the Australian Women's Weekly contain great free instructions and patterns for all kinds of crafts, usually homewares or items of clothing and accessories. Each month I'll be showing a few that are available and also making one or more - preferably ones which can also use up stash, as that is a goal of mine for 2017.
August 1947 contains only a few craft projects. For knitters, there is a Knitted Box Coat which is "made with a firm stitch which gives it tailored lines and makes it suitable for sports wear, for the office, or home". It is written to fit a 34-35" bust.
 |
| Australian Women's Weekly, Aug 9 1947 p51. |
There is also a rather neat convertible sewing apron/bag - wear it while you craft, and then it becomes a project bag. The subhead suggests it would make a lovely gift. The fabric is all cut as sized rectangles, and as the different sections - inside pocket, waistband, etc - could easily be made from contrast fabric it might be a useful way to use up some fat quarters and scraps.
 |
| Australian Women's Weekly, Aug 23 1947, p53. |
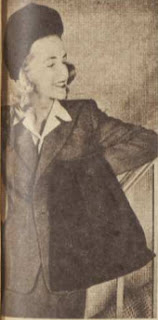
The craft project I chose to make this month was this cute beret and bag set.
 |
| Why yes, my spring wardrobe does need some variety. Australian Women's Weekly, Aug 9 1947, p49. |
The picture illustrating the instructions wasn't very clear but the vibe was enough to make me want to try. The copy was full of how fresh and wonderful this pair was, and promised me that the bag would leave me with a hand free. The instructions said they could be made in felt or fabric, and as I had a length of green felt in the stash I went with that. I am still not sure what makes this a 'Vagabond' bag, as sadly my online search results were made difficult by the bag brand of that name.
The bag is made from a long rectangle, with pleats added in the short sides.
 |
| My pleat pinned, waiting to be tacked down. |
In order to actually get this done (and as the felt wouldn't fray) I decided to hand sew it all so I could do it during times when I was at the park/watching TV/etc and wouldn't need to rely on my increasingly rare time on the sewing machine.
Once the pleats are in place, the rectangle is folded so the pleated sides are together at the top, and you sew 9 ½ inches up each side. I would recommend slightly less, as Miss 1947 may have had a more slender arm. At that measurement I couldn't easily push the bag all the way to my elbow. It also would restrict the size of what you can put in the bag, as unless I am very much misinterpreting the instructions the only way in and out are through the side holes.
 |
| Sewing up the side seams. |
The top is finished with another strip of felt with studs added. I had a minor crisis here, as while attaching one stud the die decided to get so stuck to the stud it would not come off. I had to cut it away and sew together two pieces each with two studs. As a result it looks slightly unbalanced, but I don't mind too much. Much better than it would look with a big silver die base in the centre.
 |
| The finished vagabond bag. |
 |
| The finished beret. |
The inside of the beret's band is finished with petersham ribbon to stop it stetching out.
 |
| Interior view showing petersham ribbon (and a close up of one of the bows) |
And in action:
 |
| The bag is designed to hang off your forearm, as shown here. |
 |
| The beret sits at the back of the head. |
 |
| Ready to step out. |


Ooh. I really like the look of the beret. The bag turned out well but I feel like I would lose things while getting it on and off.
ReplyDeleteYou'd be surprised - my arm fills the opening so things seem secure. Getting things IN is the challenge.
DeleteThey are both really nice! The halo beret is cute and the bag looks great. I would have trouble using it too though. I think I'd hampered by not being able to see into it properly. There would be too many "Eww what is THAT?" moments.
ReplyDeleteI like the apron/bag idea too. Not sure about for sewing but maybe for other tasks. Cleaning? Nappy changing? :P
Yes, there would be a risk of that bag becoming a sinkhole. I suppose you could use the apron/bag for cleaning but I'm not sure what cleaning things I'd want to store in a bag like that. Maybe rags/cleaning cloths?
Delete